Auto-Correlation feature detects the dynamic parameters and adds response data extractors for them.
A Test Plan using HTTP(S) requests can be correlated using this functionality.
Auto-Correlation requires recording Test Plan with Auto-Correlation Recording Template.
Auto-Correlation Recording Template is a modified version of Recording Template which
uses Correlation Response Recorder instead of View Results Tree to record response data.
Steps to record a Test Plan
Go to JMETER_HOME/bin and start JMeter with jmeter.bat on Windows
and jmeter.sh
on Linux/Unix.
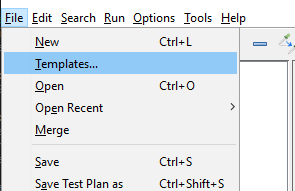
Select File → Templates... on the menu bar.
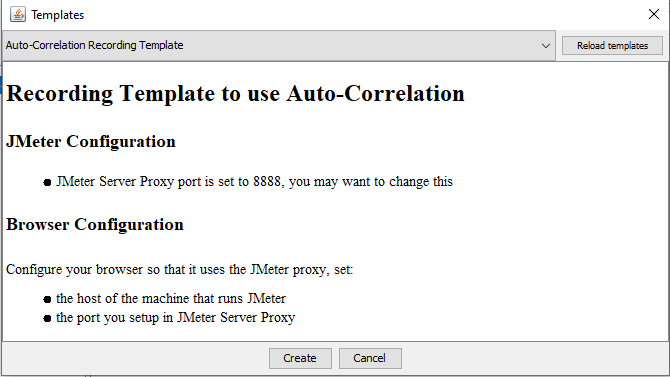
Select Auto-Correlation Recording Template on the list and click Create button.
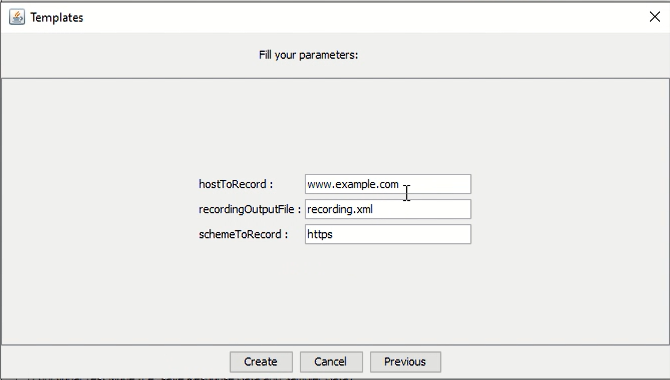
Fill the parameters and click Create button.
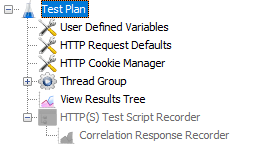
A complete Test Plan is generated
Please follow the Recording documentation here from Step 5 onwards.
1. Record a Test Plan for a testing scenario using the steps mentioned here
and save it (say TestPlan_recording_one.jmx).
2. Record another Test Plan with the same scenario. It is not required to save this test plan.
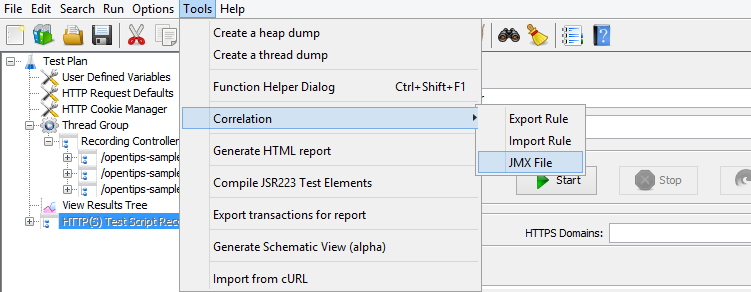
3. Click on Tools → Correlation → JMX File.
Figure 1 - The menu where correlation via JMX file is located
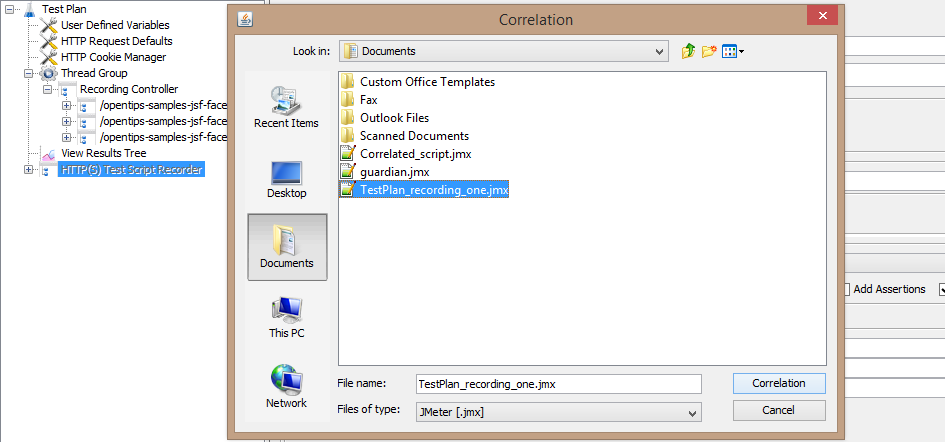
A file browse menu will open.
Figure 2 - The browse menu for JMX file
4. Browse for the Test Plan saved in Step 1 (TestPlan_recording_one.jmx)
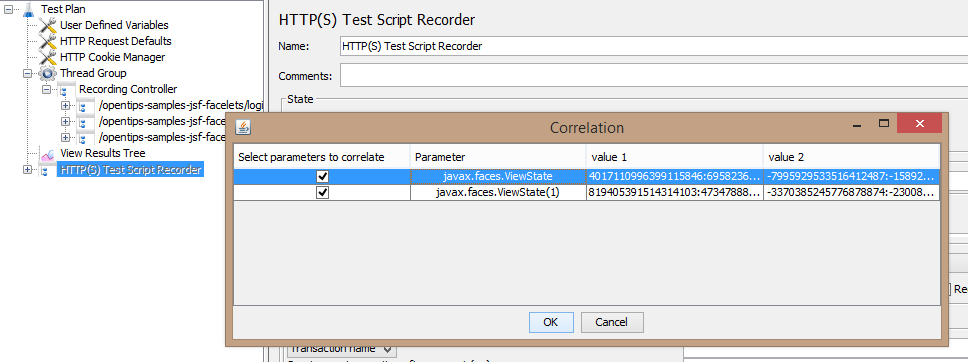
5. Click on Correlation button.
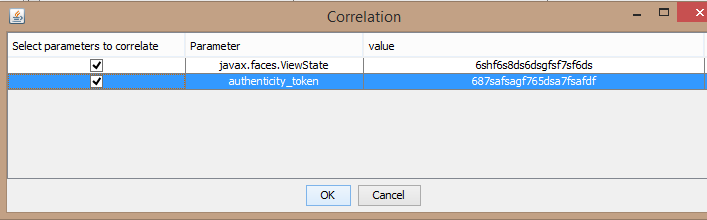
A list of dynamic parameters for correlation will be displayed in the table.
For more details on the parameter naming convention refer here.
Figure 3 - The list of parameters which can be correlated
6. Select (click check-box) the parameters you want to correlate and Click OK button.
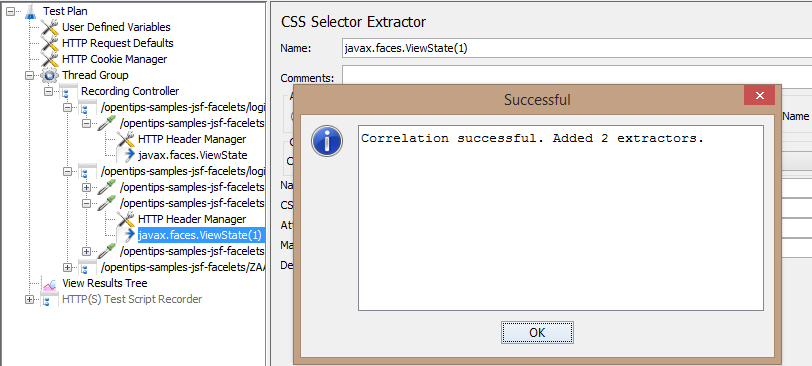
If successful, the following dialog box will be displayed and extractors
will be added in the script.
Figure 4 - Successful Correlation
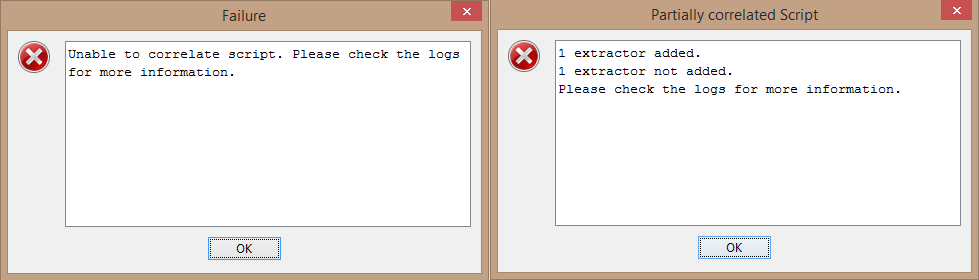
If unsuccessful or partially successful, one of the following errors will be displayed.
Figure 5 - Failure and Partial failure dialog boxes
Before correlating a Test Plan using Import/Export rule functionality,
you need to export the rule from an existing correlated Test Plan.
Export Rule
It allows you to export the response extractors in your Test Plan into a rule file.
Steps
Create/Open a Test Plan which has correlated parameters in it.
Click on Tools → Correlation → Export Rule.
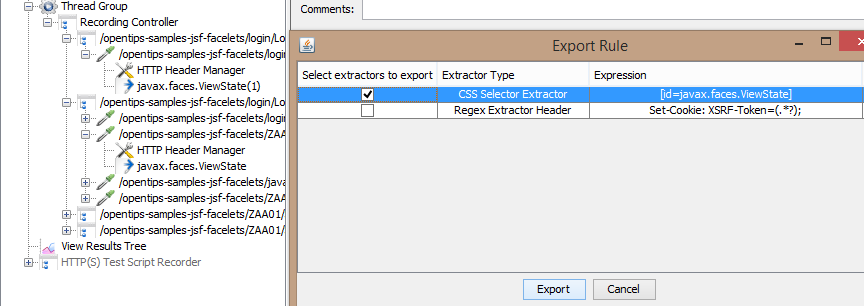
A list of extractors for which the rules can be created will be displayed.
Select the extractors for which you want to create rule and Click Export button.
Figure 6 - Export rule extractor list
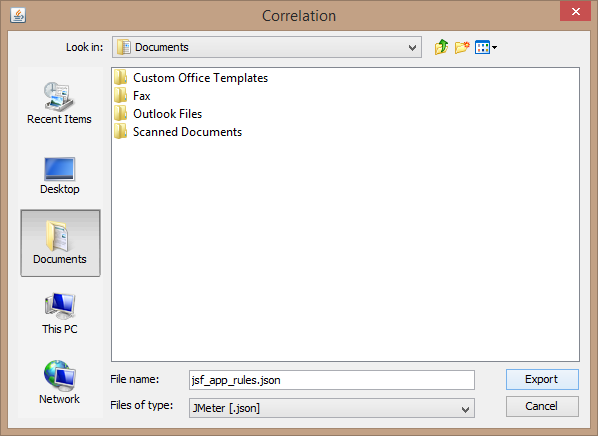
Browse for the directory where you want to save the rule file and Click Save button.
Figure 7 - Save Rule File
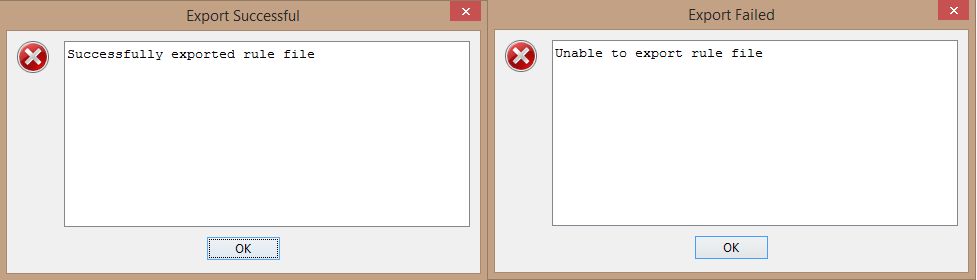
A popup will be displayed for successful/failed rule export.
Figure 8 - Success/Failure dialog boxes
Import Rule
After you have created the rule file, a Test Plan can be correlated using that rule file.
Details about the rule file format can be referred here.
Steps
Record a Test Plan using the steps mentioned here.
Click on Tools → Correlation → Import Rule.
A list of parameters which can be correlated based on the rule will be displayed.
Figure 9 - Import Rule parameter list
Select the parameters you want to correlate and Click OK button.
Popups will be displayed for successful/failed correlation similar to the ones in correlation via JMX file.
If successful, you may try out the test plan.
Correlate an empty test plan or a test plan with no HTTP Requests.
Example: Create a new test plan and try to correlate it using either JMX File or rule file.
Error: Current GUI TestPlan doesn't have any HTTP(S) Requests. Please record a plan and try again.
Correlate a test plan which is not a recorded plan.
Example: Open an existing test plan and try to correlate it using either JMX file or rule file.
Error: No Response data found. Make sure you have recorded the script and not opened it.
Correlate using an empty/invalid JMX file.
Example: Record a test plan and try to correlate it using an empty JMX test plan.
Error: Could not load the JMX file. Please check the file and try again.
Correlate using a JMX file with no HTTP requests.
Example: Record a test plan and try to correlate it using a JMX test plan with no HTTP Requests.
Error: Imported JMX file doesn't have any HTTP(S) Requests. Please check the file and try again.
Rule file should not be created manually, and if you are creating manually then user should follow rule file format
User should not try to perform correlation multiple times on extracted parameters.
Correlate while recording is still running.
This must be avoided in order to avoid any crashes.
Best practices
Only select the parameters which you thing should be correlated.
Dynamic parameters' list include parameters which should not be correlated for example username, password, date, etc...
Hence, select the parameters from the list who you think should be correlated for example authToken, csrf token, etc...
Parameter in request header (Authorisation)
Correlatable Parameter Name = "Authorisation"
Parameter in request body or query string
Correlatable Parameter Name = Actual Parameter Name
If parameter occurs twice or more then correlatable parameter name is appended by
"(parameter count)"
Example: authenticity_token, authenticity_token(1)